Installation guide
IF YOU HAVE ANY QUESTIONS, PLEASE CONTACT US AT 800-875-8071 OR EMAIL US.
PROTECTORS & SHELTERS(For Video Click here)
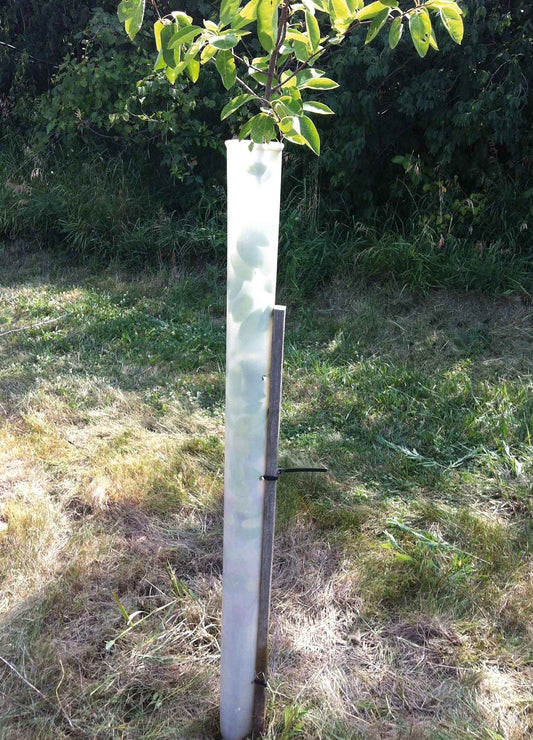
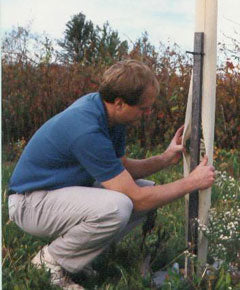
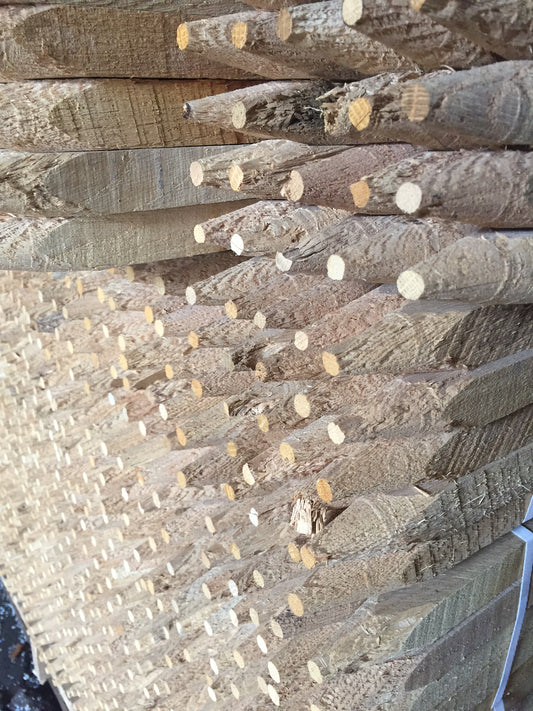
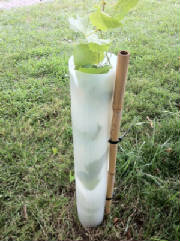
After planting the tree in accordance with proper tree planting directions, pound or press the stake into the ground at a distance from the tree equal to about one-half the diameter of the protector.
The stake should be on the side of the tree toward the prevailing wind; e.g., if the prevailing wind is from the west, the stake should be on the west side of the tree.
The top of the stake should be several inches higher than the top locktie that secures the protector to the stake. See table below for stake sizes.
TREE PRO PROTECTORS
1. Fold the collar back over the outside of the protector, with the smooth side of the protector on the inside. The purpose of the collar is to provide a soft rim so the trees' bark won't be damaged.
PLEASE NOTE: Many tree planters have found it advantageous not to fold the collar. They've found that if the collar is left upright, birds will not light on it because it's too flimsy to support their weight. Also, it saves time because it's one less step. Even with the collar up there should be no abrasion of the tree's trunk.
2. With the holes lined up, slide the lockties through both holes in each side wall and lock the tie two or three clicks to keep it from falling out. See table below for the number of lockties.
3. Carefully slide the protector down over the top of the tree and the lockties down over the stake.
PLEASE NOTE: If the trees have branches, carefully gather them together with their tips facing up before lowering the protector.
4. Make sure the bottom of the protector is in good contact with the ground.
PLEASE NOTE: Proper protector installation does not require the protector to be pressed down into the ground because doing so can sometimes cause rodent problems. Mice, voles and other animals often build nests inside protectors that are too firmly planted in the ground.
5. Tighten ties.
MIRACLE TUBE
1. Miracle Tubes come nested with zip ties already in place. Their diameters range from about 3 1/4 to about 4 1/2 inches. Choose the smaller diameter tubes for smaller trees and the larger diameter tubes for larger trees.
2. Carefully slide the protector down over the top of the tree and the lockties down over the stake.
PLEASE NOTE: If the trees have branches, carefully gather them together with their tips facing up before lowering the protector.
3. Make sure the bottom of the protector is in good contact with the ground.
PLEASE NOTE: Proper protector installation does not require the protector to be pressed down into the ground because doing so can sometimes cause rodent problems. Mice, voles and other animals often build nests inside protectors that are too firmly planted in the ground.
FINAL INSPECTION
Before installing the bird net, look down inside the protector to make sure the tree's terminal bud is pointing straight up.
ROOT DIP Mycorrhizae
Root Dip is for use with bare-root trees. Mix contents of bag with water to form a gel with the consistency of thick gravy. Let stand for 15 minutes. Dip roots into solution prior to planting.
You can let the trees sit in the solution for up to three or four hours before planting. Make sure gel adheres to tree's roots.
ROOT REVIVER Mycorrhizae
Root Reviver can be used on established trees or new trees at planting, including bare-root trees. For directions on using with established trees, please refer to the instructions included with the product.
For bareroot seedlings, after digging the hole, add four to six ounces of Root Reviver to the soil from the hole and mix thoroughly.
NUTRA-PRO Controlled-Release Fertilizer
Nutri Pak controlled-release fertilizer is designed to release a controlled amount of NPK into the soil around the tree's roots over time.
Please read instructions on the package itself for complete directions. NutriPak is designed to be placed in the hole as it is. Do not tear open and empty the package contents into the hole. Tiny pores in the package allow the contents to slowly dissolve and seep into the tree's root zone at a controlled rate over a period of several years.
WEED PRO Weed Mats
Weed Pro can be used with or without a protector and you can install it before installing the protector or after. (It's better to install Weed Pro before installing the protector so that it covers the ground inside the protector next to the tree.)
Carefully slide the top of the tree and/or protector through the "X" cut in the center of the weed mat, then lower the mat to the ground. Fold the corners over to double the thickness of the mat for the staples to go through.
Pound the staples into the ground, at an angle away from the tree, being careful not to bend them. Weed Pro is properly installed when it is taut and flat to the ground.
BIRD NETS
Nets are provided for 48", 60" and 72" protectors only. They are usually not necessary for smaller sizes. Installing protectors without Bird Nets is hazardous to bluebirds and other insect-eating birds. Installation is fast, simple and the responsible thing to do. Simply slide the net over the top of the protector.
Without bird nets, birds trapped inside protectors will not only die, they can also destroy the tree as they try to escape. Please inspect your trees periodically to make sure the net is in place. The mesh must be removed before the tree emerges from the protector; otherwise, they can deform the tree.
A properly installed tree protector and weed mat.